Here we're going to show you how to create the image below -- an elegant brushed silver text effect immersed in an abstract reflective watery scene.

Step #1
First you will need to download the two textures below and convert them into photoshop patterns for later. To do this simply open each image then go to EDIT >> DEFINE PATTERN in the menu. Alternatively, if you've downloaded the source files at the end of this post, simply install the pattern set entitled reflective-brushed-metal-tut.pat by double clicking on it.)
Step #2
Create a new transparent document 670px * 400px at 72dpi as seen below.
Step #3
To keep our psd file organized first click on the folder icon in the layer pallet 3 times to create three folders and name them FRAME, TEXT, and BACKGROUND respectively.
Create a new layer within the FRAME folder and name it frame. Activate the shape tool by typeing U, make sure the rectangular shape tool is selected, then draw out a square similar to the one below, leaving a little room on the top and bottom.
Step #5
Activate the layer styles dialog box on your shape layer by double clicking on it or by going to LAYER >> LAYER STYLE >> BLENDING OPTIONS in the menu. Then enter the settings below.
Step #6
Create a new layer above the frame layer by going to LAYER >> NEW >> LAYER in the menu, activate the text tool by typeing T, then type in your title using the settings below.
STEP #7
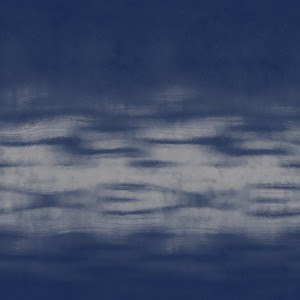
Within the BACKGROUND folder create a new pattern fill layer by going to LAYER >> NEW FILL LAYER >> PATTERN in the menu and choose the abstract water pattern you either installed or created in step #1 as seen below. Then set the layer opacity to 60%
STEP #8
Above the water layer create a color fill layer by going to LAYER >> NEW FILL LAYER >> COLOR in the menu. Chose #000000 for the color theen set the layer blend mode to Color as seen below.
STEP #9
Within the TEXT folder now, create a new layer by going to LAYER >> NEW >> LAYER in the menu, activate the text tool by typeing T and type in some text using the Times at 330pt as seen below.
Step #10
Duplicate the text layer you just created by going to LAYER >> DUPLICATE LAYER then open up the layer styles pallet on the top text layer by going to LAYER >> LAYER STYLE >> BLENDING OPTIONS in the menu and enter the settings below.
Step #12
Select both text layers and drag them down to the new layer button to duplicate them, then merge the resulting layers by going to LAYERS >> MERGE LAYERS in the menu then name the merged layers “Reflection”.
No comments:
Post a Comment